Stuffing pin cushion
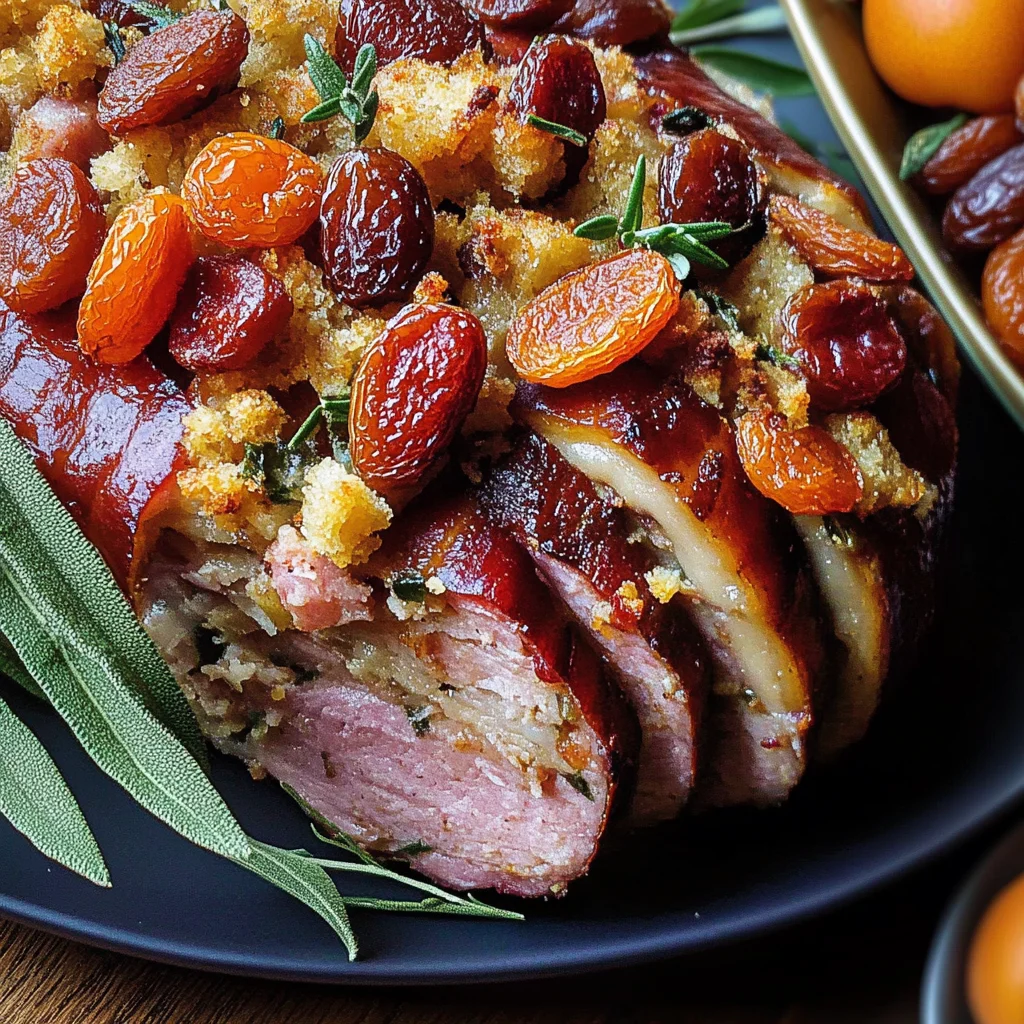
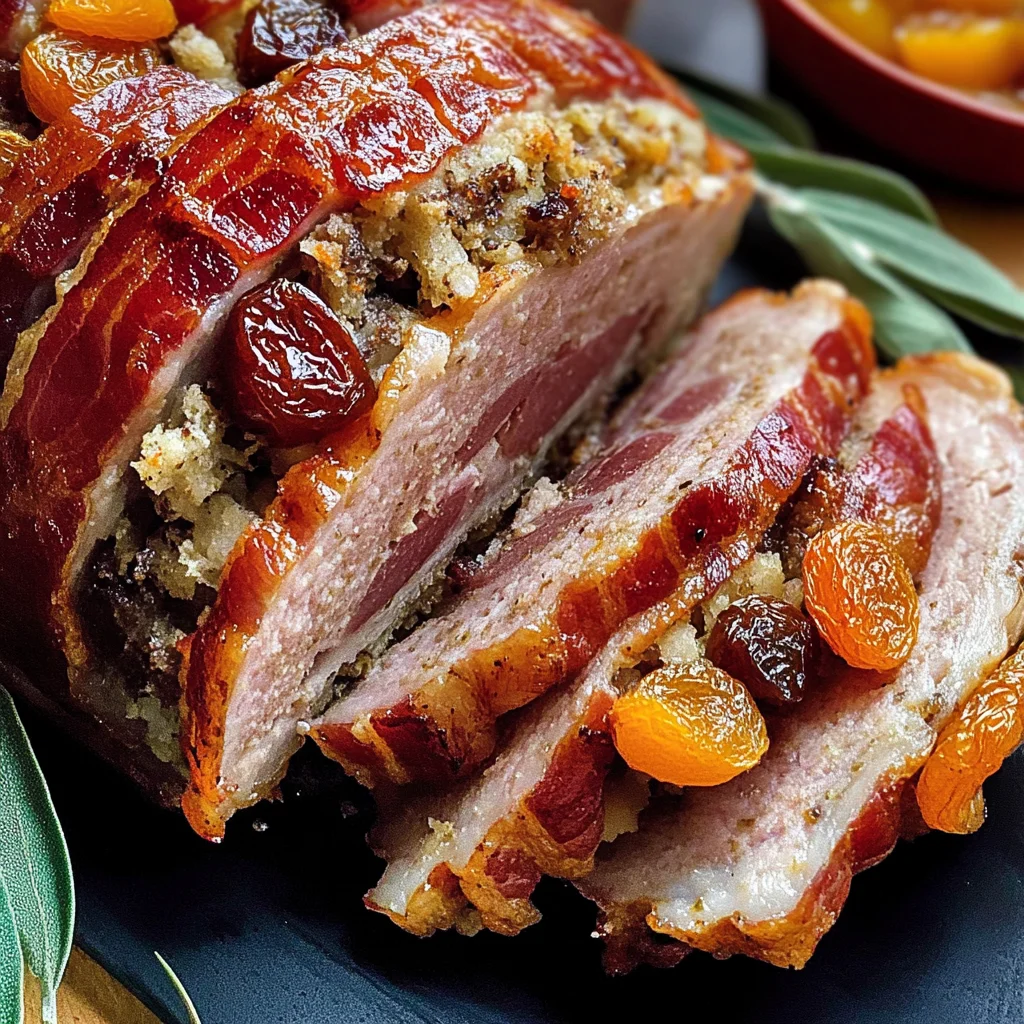
If you’re looking for a show-stopping dish that brings everyone together, then this stuffing pin cushion is just the thing! It’s not only visually stunning but also packed with flavors that will warm your heart. This recipe has been a favorite in my family for years, making regular appearances during festive gatherings and cozy dinners alike. Plus, it’s perfect for those busy weeknights when you have leftovers to use up—just slice it up and stuff it into sandwiches!
What makes this stuffing pin cushion special is its unique shape and combination of hearty ingredients. Everyone will be impressed when you bring it to the table, and trust me, they’ll be coming back for seconds!
Why You’ll Love This Recipe
- Easy to Prepare: With just a few simple steps, you’ll have a delightful dish ready in no time!
- Family-Friendly: The delicious flavors make it a hit with both kids and adults alike.
- Make-Ahead Convenience: You can prepare this dish ahead of time, saving you stress on busy days.
- Festive Centerpiece: Its beautiful shape makes it perfect for holiday celebrations or any gathering.
- Versatile Leftovers: Great for using up leftovers in creative ways, especially in sandwiches!
Ingredients You’ll Need
This stuffing pin cushion is made from simple, wholesome ingredients that come together beautifully. Here’s what you’ll need:
For the Stuffing
- 1 tbsp rapeseed oil
- 2 red onions, sliced
- 2 garlic cloves, finely chopped
- 1.2kg beef sausagemeat
- 100g fresh breadcrumbs
- 180g cooked peeled chestnuts, chopped
- 75g dried apricots, chopped
- 75g prunes, chopped
- 50g pine nuts
- 10g fresh sage, chopped
- 1/2 tsp ground nutmeg
For the Wrapping
- 22-24 rashers streaky bacon
Variations
This recipe is wonderfully flexible! Feel free to mix things up based on your preferences or what you have on hand.
- Swap the protein: Use chicken or turkey sausagemeat for a lighter version.
- Add more veggies: Toss in some spinach or mushrooms for extra nutrition and flavor.
- Try different nuts: Swap pine nuts with walnuts or pecans for a different texture.
- Go gluten-free: Use gluten-free breadcrumbs to make this dish suitable for gluten-sensitive folks.
How to Make Stuffing Pin Cushion
Step 1: Sauté the Aromatics
Start by heating the rapeseed oil in a large pan over medium heat. Add the sliced red onions and finely chopped garlic. Sauté until the onions are translucent and fragrant—this step is crucial as it builds the base flavor for your stuffing.
Step 2: Combine Ingredients
In a large mixing bowl, combine the beef sausagemeat with your sautéed onions and garlic. Add in the breadcrumbs, cooked chestnuts, dried apricots, prunes, pine nuts, sage, and nutmeg. Mix everything together thoroughly; this ensures every bite is filled with flavor!
Step 3: Shape Your Pin Cushion
Now comes the fun part! Transfer your mixture onto a baking tray lined with parchment paper. Shape it into a round cushion form—don’t worry about perfection here; rustic charm is part of its appeal.
Step 4: Wrap in Bacon
Wrap your shaped stuffing mixture with the rashers of bacon neatly around the outside. This not only adds flavor but also helps keep everything moist while baking.
Step 5: Bake to Perfection
Preheat your oven to 180°C (350°F). Place your stuffed pin cushion in the oven and bake for about 1 hour and 30 minutes until golden brown. The aroma will fill your kitchen and make everyone anxious to dig in!
Enjoy making this lovely stuffing pin cushion—it’s sure to become a cherished recipe at your gatherings too!
Pro Tips for Making Stuffing Pin Cushion
Creating the perfect stuffing pin cushion can be a breeze with a few helpful hints in your back pocket!
-
Choose quality sausagemeat: Using high-quality beef sausagemeat ensures a rich flavor and better texture, making your stuffing more enjoyable and satisfying.
-
Fresh herbs are key: Incorporating fresh sage adds a vibrant taste that dried herbs simply can’t replicate. Fresh herbs bring life to your dish and enhance the overall aroma.
-
Don’t skip the chestnuts: Adding cooked peeled chestnuts gives a delightful nuttiness and crunch to your stuffing, elevating its flavor profile and making it more exciting.
-
Let it rest before slicing: Allowing your stuffing pin cushion to rest for about 10-15 minutes after baking helps it set, making it easier to slice without falling apart.
-
Experiment with add-ins: Feel free to customize with other ingredients like nuts or dried fruits based on your preferences. This allows you to create a unique version that suits your taste perfectly!
How to Serve Stuffing Pin Cushion
Presenting your stuffing pin cushion beautifully can make all the difference during festive gatherings. It’s not just about taste; the visual appeal adds to the overall experience!
Garnishes
-
Chopped fresh parsley: A sprinkle of fresh parsley adds a pop of color and freshness, brightening up the dish visually and flavor-wise.
-
Cranberry sauce: A side of homemade cranberry sauce complements the savory flavors beautifully, providing a sweet-tart contrast that enhances each bite.
Side Dishes
-
Roasted Brussels sprouts: These crispy sprouts bring a lovely bitterness that balances the richness of the stuffing. Toss them with olive oil, salt, and pepper for an easy yet impressive side.
-
Garlic mashed potatoes: Creamy garlic mashed potatoes serve as a comforting base for your stuffing, soaking up all those delicious flavors while adding their own creamy goodness.
-
Honey-glazed carrots: Sweet and colorful, honey-glazed carrots add brightness to your plate. Their natural sweetness pairs wonderfully with savory dishes like this one.
-
Green bean almondine: Sautéed green beans topped with toasted almonds provide a delightful crunch and freshness that cuts through the heartiness of the stuffing pin cushion.
Get ready to impress your guests with this stunning dish! With thoughtful garnishing and sides, you’ll create an unforgettable meal that’s sure to be talked about long after the last bite. Enjoy!
Make Ahead and Storage
This stuffing pin cushion is not only a show-stopper on your festive table, but it’s also perfect for meal prep! You can make it ahead of time, store it properly, and enjoy it well beyond the holiday feast.
Storing Leftovers
- Allow the stuffing pin cushion to cool completely before storing.
- Wrap it tightly in plastic wrap or aluminum foil.
- Place it in an airtight container.
- Store in the refrigerator for up to 3 days.
Freezing
- Ensure the stuffing pin cushion is fully cooled.
- Wrap it securely in plastic wrap, followed by aluminum foil for extra protection.
- Label with the date and freeze for up to 2 months.
- For best results, slice it before freezing for easier reheating later.
Reheating
- Thaw frozen stuffing pin cushion overnight in the refrigerator.
- Preheat your oven to 180°C (350°F).
- Place the stuffing on a baking tray covered with foil to retain moisture.
- Heat for about 25-30 minutes or until warmed through. Remove foil during the last 10 minutes for a crispy top.
FAQs
Here are some common questions you might have about making this delicious stuffing pin cushion.
Can I use chicken sausagemeat instead of beef for my stuffing pin cushion?
Absolutely! Chicken sausagemeat works wonderfully as an alternative. Just keep an eye on cooking times as they may vary slightly.
How can I make my stuffing pin cushion vegetarian?
For a vegetarian version of this stuffing pin cushion, replace the sausagemeat with a mixture of sautéed mushrooms, lentils, and additional vegetables. Adjust spices and seasonings to your taste!
What is the best way to serve my stuffing pin cushion?
Your stuffing pin cushion can be served warm as a side dish or sliced into sandwiches with leftovers. It’s versatile and pairs beautifully with cranberry sauce or gravy!
Can I prepare the stuffing pin cushion in advance?
Yes! This stuffing pin cushion is perfect for meal prep. You can make it a day ahead or even freeze it for later.
Final Thoughts
I hope you’re feeling inspired to create this delightful stuffing pin cushion! It’s such a unique dish that brings warmth and flavor to your holiday gatherings. Enjoy slicing into this beautiful centerpiece, whether it’s at dinner or tucked into sarnies the next day. Happy cooking, and may your kitchen be filled with joy!
Stuffing Pin Cushion

Create a stunning stuffing pin cushion that is sure to be the centerpiece of your festive table! This visually appealing dish combines savory beef sausagemeat with a delightful mix of chestnuts, dried fruits, and aromatic herbs. It’s perfect for gatherings and can even be enjoyed as leftovers in sandwiches. Whether celebrating a holiday or enjoying a cozy dinner with family, this recipe brings warmth and flavor to every occasion.
- Prep Time: 15 minutes
- Cook Time: 90 minutes
- Total Time: 1 hour 45 minutes
- Yield: Serves approximately six people 1x
- Category: Main
- Method: Baking
- Cuisine: American
Ingredients
- 1 tbsp rapeseed oil
- 2 red onions, sliced
- 2 garlic cloves, finely chopped
- 1.2kg beef sausagemeat
- 100g fresh breadcrumbs
- 180g cooked peeled chestnuts, chopped
- 75g dried apricots, chopped
- 75g prunes, chopped
- 50g pine nuts
- 10g fresh sage, chopped
- 1/2 tsp ground nutmeg
Instructions
- Heat rapeseed oil in a large pan over medium heat. Sauté sliced onions and garlic until translucent.
- In a mixing bowl, combine beef sausagemeat with sautéed onions and garlic. Mix in breadcrumbs, chestnuts, dried apricots, prunes, pine nuts, sage, and nutmeg.
- Shape the mixture into a round cushion on a parchment-lined baking tray.
- Wrap the shaped stuffing with bacon around the outside.
- Preheat oven to 180°C (350°F) and bake for about 1 hour and 30 minutes until golden brown.
Nutrition
- Serving Size: 150g
- Calories: 370
- Sugar: 8g
- Sodium: 560mg
- Fat: 24g
- Saturated Fat: 8g
- Unsaturated Fat: 14g
- Trans Fat: 0g
- Carbohydrates: 22g
- Fiber: 3g
- Protein: 18g
- Cholesterol: 70mg