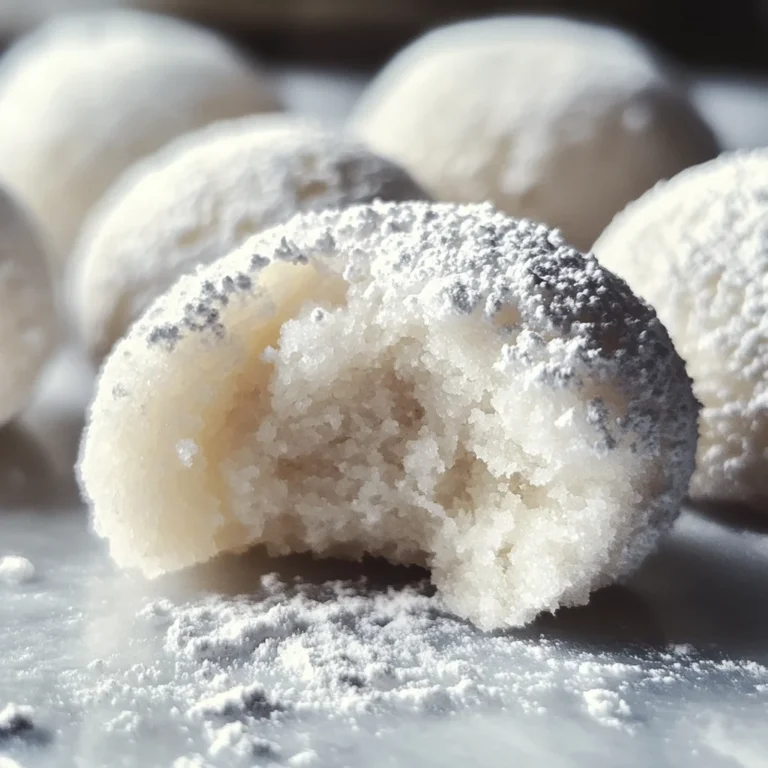
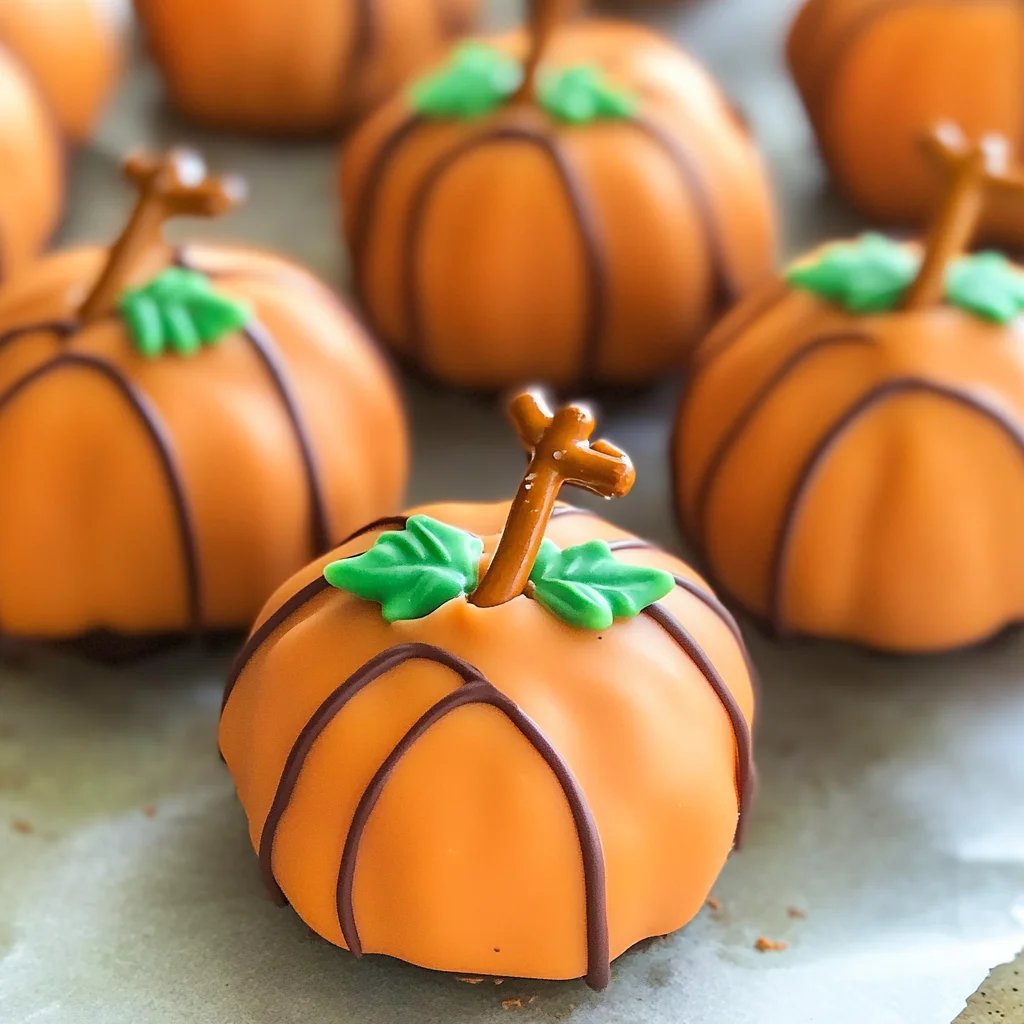
Pumpkin Oreo Balls
If you’re looking for a fun and delightful treat that captures the essence of autumn, you’ve got to try these Pumpkin Oreo Balls! They are the perfect blend of creamy, sweet, and just a hint of pumpkin spice. I love whipping these up during the fall months, especially for family gatherings or cozy nights at home. The best part? They’re incredibly easy to make—no baking required! You’ll find that everyone, from kids to grandparents, can’t resist these tasty little bites.
What makes this recipe even more special is how versatile it is. Whether you’re hosting a party or simply want to indulge in something sweet after dinner, Pumpkin Oreo Balls fit right in. Plus, they’re so cute decorated with pretzel sticks and green icing that they’ll light up any dessert table!
Why You’ll Love This Recipe
- Super Easy to Make: With just a few simple steps, you can whip up these tasty treats without any fuss.
- No Baking Required: Perfect for busy days when you don’t have time to turn on the oven.
- Family-Friendly Fun: Kids will love helping roll the balls and decorating them!
- Make-Ahead Treat: You can prepare these ahead of time and refrigerate them until you’re ready to serve.
- Deliciously Irresistible: The combination of Oreo cookies and cream cheese makes for a rich, creamy dessert that everyone will adore.

Ingredients You’ll Need
These Pumpkin Oreo Balls use simple and wholesome ingredients that you probably already have in your pantry. Let’s gather everything we need!
For the Base
- 36 Oreo cookies
- 8 oz cream cheese (softened)
For the Coating
- 12 oz orange candy melts
Variations
This recipe is wonderfully flexible! Here are some fun ideas to switch things up:
- Add Spice: Mix in a pinch of pumpkin spice or cinnamon with the cream cheese for an extra flavor boost.
- Change Up the Chocolate: Use dark chocolate or white chocolate in place of orange candy melts for different tastes.
- Make Them Mini: Roll smaller balls for bite-sized treats that are perfect for parties or snacking!
- Decorate Differently: Get creative with toppings; drizzle with chocolate or sprinkle with crushed nuts for added texture.
How to Make Pumpkin Oreo Balls
Step 1: Crush the Oreos
Start by pulsing those Oreo cookies in a food processor until they are finely crumbled. This step is crucial because it creates the base texture of your pumpkin balls. The finer the crumbs, the smoother your mixture will be!
Step 2: Mix It All Together
Next, mix in your softened cream cheese. Blend until everything is well combined. This creamy mixture will hold everything together beautifully and add that delicious richness we all love.
Step 3: Form the Balls
Now it’s time to scoop out about 1-inch portions and roll them into balls. Place these on a parchment-covered baking sheet and pop them into the fridge for about 15 minutes. Chilling helps them firm up before decorating.
Step 4: Add Some Character
Once chilled, take a toothpick and gently score lines into each ball to resemble pumpkins. This little detail adds charm and makes them extra festive! Return them to the refrigerator for another 10 minutes.
Step 5: Melt the Chocolate
While those are chilling again, melt your orange candy melts. You can do this over a double boiler or in the microwave—just follow package directions. Melting is key because it creates that gorgeous coating we all look forward to.
Step 6: Dip and Decorate
Now comes the fun part! Dip each pumpkin ball into the melted chocolate, making sure to shake off any excess. Then place them back on your lined baking sheet and immediately decorate each one with a small pretzel stick as a stem and green icing leaves on top!
Step 7: Chill Again
Finally, let these little cuties chill in the refrigerator until you’re ready to serve. This final set helps everything firm up nicely so they hold their shape when served.
Enjoy your delicious Pumpkin Oreo Balls! They make every gathering feel special and are sure to become a favorite in your home just like they are in mine.
Pro Tips for Making Pumpkin Oreo Balls
Making Pumpkin Oreo Balls is a delightful and straightforward process, and with a few tips, you can elevate your treats to perfection!
-
Use room temperature cream cheese: This allows for easier mixing, ensuring a smooth and well-combined mixture that holds together beautifully.
-
Chill the balls properly: After scooping the mixture, chilling them helps maintain their shape during the dipping process, resulting in perfectly round pumpkin balls.
-
Don’t rush the chocolate melting: Whether using a microwave or double boiler, melting the orange candy melts slowly prevents burning and ensures a smooth consistency for coating.
-
Experiment with decorations: Get creative with your toppings! Use different colored icing or sprinkles to personalize your pumpkin balls for any occasion.
-
Store properly: Keep your finished Pumpkin Oreo Balls in an airtight container in the refrigerator. They stay fresh for up to a week, making them perfect for meal prep or last-minute treats!
How to Serve Pumpkin Oreo Balls
Presenting your Pumpkin Oreo Balls can be just as fun as making them! With a little creativity, you can make these treats stand out at any gathering.
Garnishes
- Chocolate drizzle: A light drizzle of melted chocolate on top adds extra flair and richness to each bite.
- Sprinkles: Orange or green sprinkles can give a festive touch, perfect for autumn-themed parties or Halloween celebrations.
Side Dishes
- Autumn salad: A fresh salad with mixed greens, cranberries, and pecans offers a nice balance of flavors and textures alongside the sweet Pumpkin Oreo Balls.
- Caramel apple slices: Sweet and crunchy apple slices drizzled with caramel sauce create a delightful contrast to the creamy pumpkin flavors.
- Vanilla ice cream: The rich creaminess of vanilla ice cream pairs beautifully with the rich texture of the Pumpkin Oreo Balls, creating a delicious dessert combo.
- Pumpkin spice latte: For a cozy drink pairing, serve these treats alongside a warm pumpkin spice latte—perfect for those chilly evenings!
Enjoy serving your delightful Pumpkin Oreo Balls—they’re sure to bring smiles to everyone who tries them!
Make Ahead and Storage
These delightful Pumpkin Oreo Balls are perfect for meal prep! You can easily make them ahead of time and store them, making your dessert game a breeze.
Storing Leftovers
- Store any leftover Pumpkin Oreo Balls in an airtight container in the refrigerator.
- They will stay fresh for up to one week.
- For best results, separate layers with parchment paper to prevent sticking.
Freezing
- Place the Pumpkin Oreo Balls on a baking sheet and freeze until solid.
- Once frozen, transfer them to a freezer-safe container or zip-top bag.
- They can be stored in the freezer for up to three months.
Reheating
- These dessert balls are best served cold or at room temperature.
- Simply take them out of the fridge or freezer and let them sit for a few minutes before enjoying.
FAQs
Here are some common questions you might have about making these Pumpkin Oreo Balls!
Can I use different flavors of Oreos for Pumpkin Oreo Balls?
Absolutely! While classic Oreos work wonderfully, feel free to experiment with different flavors like pumpkin spice or golden Oreos to add your personal touch.
How do I achieve the perfect coating for my Pumpkin Oreo Balls?
To get that smooth finish, ensure the orange candy melts are fully melted and at a slightly warm temperature before dipping. This will help create an even coating without clumping.
How should I decorate my Pumpkin Oreo Balls?
You can get creative with decorations! Use pretzel sticks as stems and pipe leaf designs using green icing for an adorable pumpkin look.
Can I make these Pumpkin Oreo Balls ahead of time?
Yes! These no-bake treats can be prepared in advance and stored. Just follow the storage instructions above for optimal freshness.
Final Thoughts
I hope you’re as excited as I am to whip up these charming Pumpkin Oreo Balls! They’re not only fun to make but also bring a bit of autumn magic to any gathering. Whether you’re sharing them with friends or enjoying them all by yourself, I’m sure they’ll be a hit. Happy baking, and enjoy every delicious bite!
Pumpkin Oreo Balls

Indulge in the delightful flavors of fall with these Pumpkin Oreo Balls! This no-bake dessert combines the rich, creamy goodness of cream cheese and Oreo cookies, bringing a cheerful pumpkin-inspired treat to your table. Perfect for family gatherings, cozy nights in, or festive parties, these sweet bites are incredibly easy to prepare and can be decorated to add a charming touch. With just a few simple ingredients and steps, you’ll create irresistible treats that will have everyone coming back for more. Plus, they can be made ahead of time, making them an ideal sweet snack for any occasion!
- Prep Time: 20 minutes
- Cook Time: 0 minutes
- Total Time: 20 minutes
- Yield: Makes about 24 servings 1x
- Category: Dessert
- Method: No-bake
- Cuisine: American
Ingredients
- 36 Oreo cookies
- 8 oz cream cheese (softened)
- 12 oz orange candy melts
Instructions
- Crush the Oreo cookies in a food processor until finely crumbled.
- Mix in softened cream cheese until well combined.
- Form the mixture into 1-inch balls and chill on a parchment-lined baking sheet for 15 minutes.
- Score lines into each ball to resemble pumpkins and chill for an additional 10 minutes.
- Melt the orange candy melts according to package instructions.
- Dip each pumpkin ball into the melted candy and decorate with pretzel sticks as stems and green icing leaves.
- Chill again until firm, then serve.
Nutrition
- Serving Size: 1 ball (25g)
- Calories: 100
- Sugar: 9g
- Sodium: 50mg
- Fat: 5g
- Saturated Fat: 2g
- Unsaturated Fat: 2g
- Trans Fat: 0g
- Carbohydrates: 12g
- Fiber: 0g
- Protein: 1g
- Cholesterol: 5mg