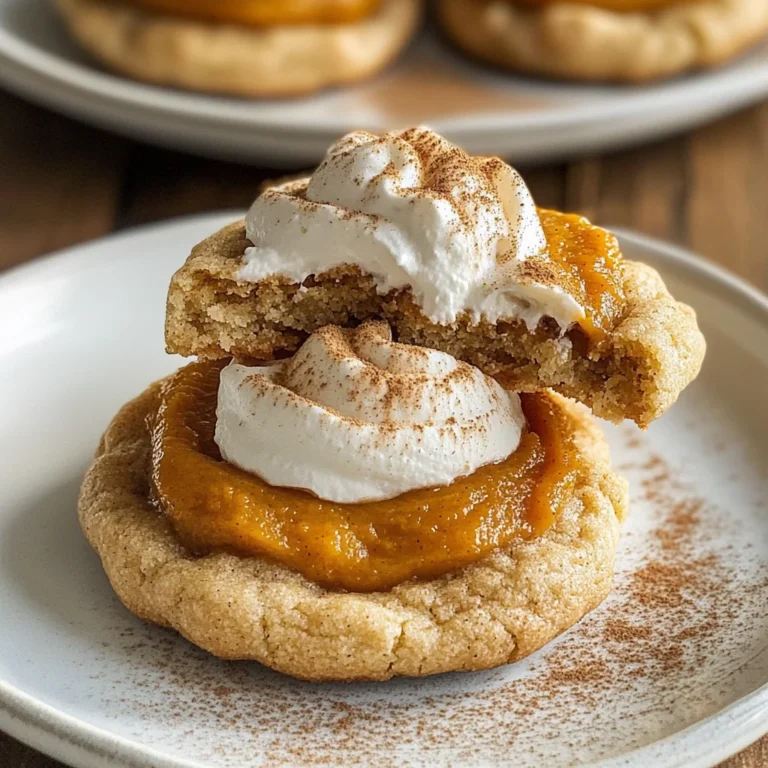
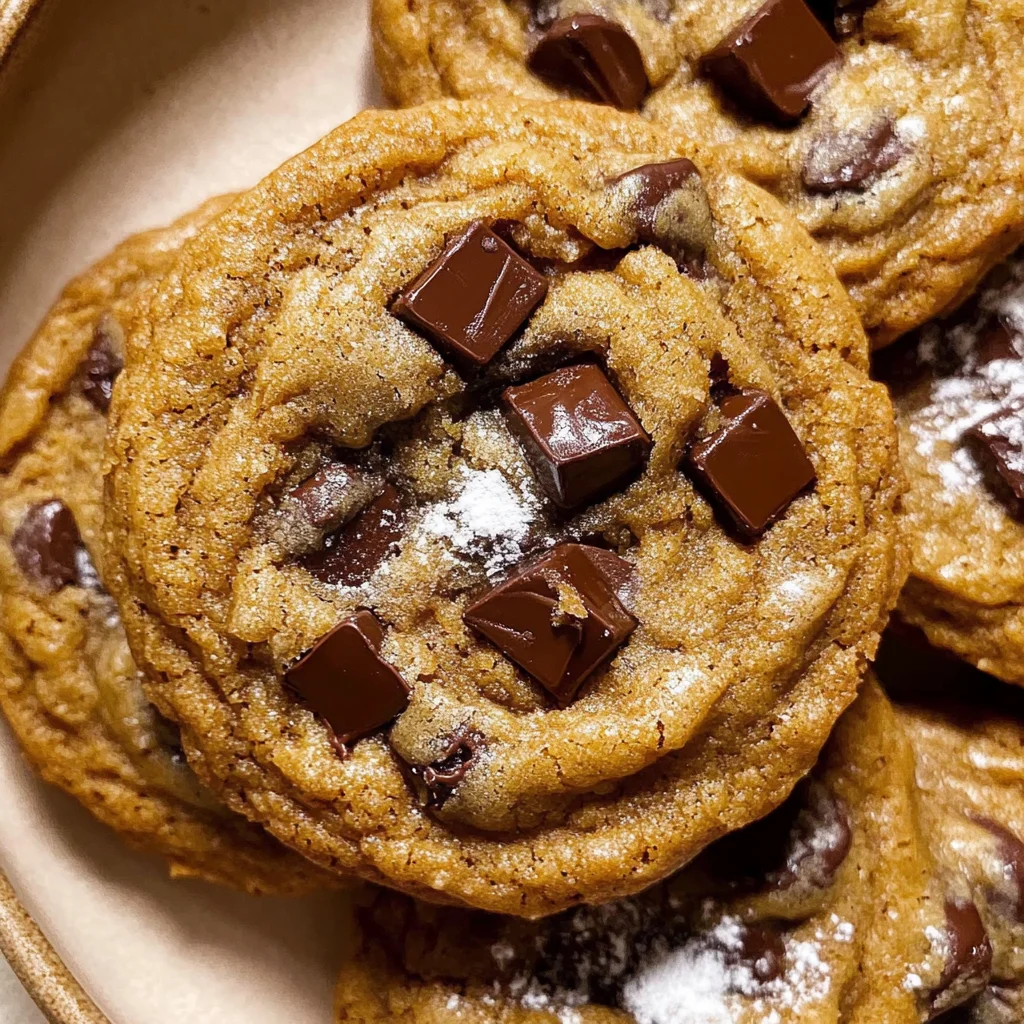
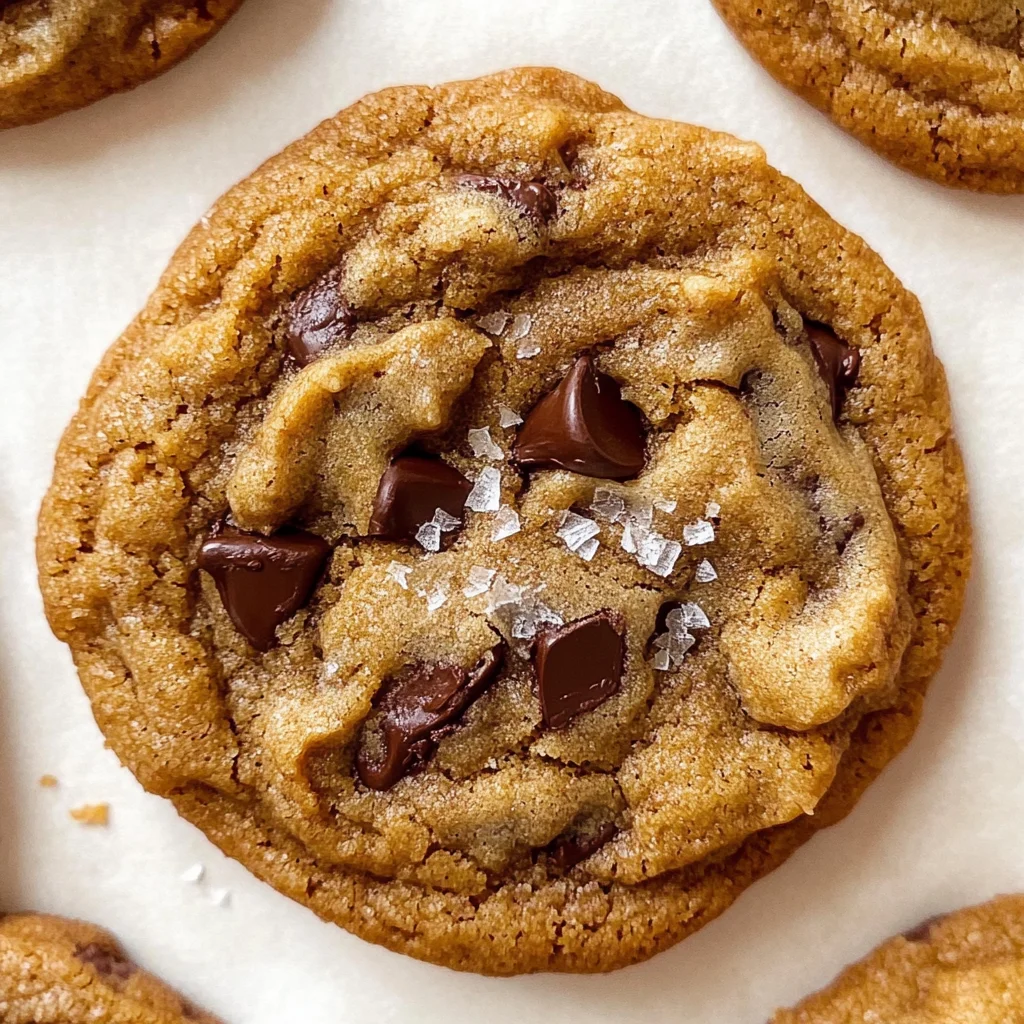
Pumpkin Chocolate Chip Cookies
If you’re looking for the perfect fall treat, look no further than these delightful Pumpkin Chocolate Chip Cookies! They’re not just any cookies; they combine the warm, cozy flavors of pumpkin spice with rich chocolate chips for a truly comforting dessert. These cookies are soft and chewy, making them a favorite among family and friends. Plus, this recipe is super simple—no chilling or fancy mixers needed—making it ideal for busy weeknights or gatherings.
They are sure to bring a smile to everyone’s face, whether you’re enjoying them after a long day or sharing them at your next family gathering. So grab your apron, and let’s bake some memories together with these delicious Pumpkin Chocolate Chip Cookies!
Why You’ll Love This Recipe
- Easy to make: No need for complicated techniques or special equipment; this recipe is straightforward and fun!
- Perfectly chewy: Enjoy cookies that are soft and chewy without being cakey—just the way you love them.
- Great for sharing: With about 15 cookies in this batch, they’re perfect for sharing with friends or keeping all to yourself!
- Versatile treats: These cookies are great for any occasion—from cozy nights in to festive gatherings.
- Delicious flavor: The combination of pumpkin and chocolate creates a unique flavor that everyone will adore.
Ingredients You’ll Need
These are simple, wholesome ingredients that come together beautifully to create your new favorite cookie!
- 1 cup cold unsalted butter
- 2/3 cup Libby’s Pumpkin Puree (room temperature)
- 1/2 cup granulated sugar
- 1/2 cup light brown sugar (packed)
- 2 large egg yolks (room temperature)
- 2 teaspoons vanilla extract
- 1 2/3 cup + 1 tablespoon all-purpose flour (See notes below for measuring)
- 2 1/2 teaspoons pumpkin spice
- 1 teaspoon baking soda
- 1/2 teaspoon fine sea salt
- 1 cup finely chopped chocolate bar or chocolate chips
Variations
One of the best things about these Pumpkin Chocolate Chip Cookies is how flexible the recipe can be! Feel free to get creative with some fun variations:
- Add nuts: Chopped walnuts or pecans add a nice crunch and additional flavor.
- Use different chocolate: Swap out dark chocolate for white chocolate chips or even butterscotch chips for a twist!
- Make them spicier: If you love a little heat, add some cayenne pepper or extra cinnamon to the dough.
- Try other add-ins: Dried cranberries or raisins can add a fruity touch that pairs well with pumpkin!
How to Make Pumpkin Chocolate Chip Cookies
Step 1: Preheat and Prepare
Start by preheating your oven to 350°F (180°C). This step is crucial because it ensures that your cookies bake evenly. Line two baking trays with parchment paper as well; this prevents sticking and makes cleanup a breeze.
Step 2: Brown the Butter
In a large stainless steel pan, brown the butter. Keep an eye on it as it foams, pops, and crackles—this is all part of the process! Once you see those lovely brown bits forming at the bottom and smell that nutty aroma, remove it from heat. Letting it cool in the fridge until it reaches about 75°F is important for achieving that perfect cookie texture.
Step 3: Prep the Pumpkin Puree
To ensure your cookies aren’t too wet, spread the pumpkin puree on a plate and use paper towels to soak up excess moisture. This helps concentrate the flavor of the pumpkin while giving your cookies the right consistency.
Step 4: Mix Sugars with Butter
Once your butter has cooled down, whisk in both sugars until they resemble pale wet sand. This step adds sweetness and contributes to that wonderful chewy texture we’re aiming for.
Step 5: Combine Wet Ingredients
Next, whisk in egg yolks, vanilla extract, and your prepared pumpkin puree until everything is combined smoothly. Each ingredient plays its role here in creating richness and depth of flavor.
Step 6: Add Dry Ingredients
Carefully fold in flour, pumpkin spice, baking soda, salt, and chocolate chips until just combined. Be gentle during this step; overmixing can lead to tough cookies!
Step 7: Scoop and Shape
Using a cookie scoop (about three tablespoons), roll dough into balls between your palms before placing them on your lined baking trays spaced about two to three inches apart. For those luscious pools of melted chocolate on top, feel free to press larger pieces of chocolate onto each cookie before baking!
Step 8: Bake Away!
Bake one tray at a time for about 9–13 minutes. You want those edges golden brown but leave the centers slightly underbaked—they’ll continue cooking as they cool on the rack! A trick I love is using a large round cookie cutter immediately after pulling them from the oven to shape them perfectly round.
Step 9: Cool and Enjoy
Let those delicious cookies cool completely on a wire rack before removing them from the tray. Then it’s time to enjoy every last bite! Store any leftovers in an airtight container at room temperature for up to three days—or freeze cookie dough balls for future baking sessions!
Now you have all you need to create these delightful Pumpkin Chocolate Chip Cookies! Happy baking!
Pro Tips for Making Pumpkin Chocolate Chip Cookies
Making these cookies can be an absolute joy, and with a few helpful tips, you’ll elevate your baking game!
-
Use Room Temperature Ingredients: Ensuring that your butter and egg yolks are at room temperature helps create a smooth batter, which contributes to the cookies’ perfect texture.
-
Don’t Skimp on the Browning Process: Taking the time to brown the butter enhances the flavor of your cookies. The nutty aroma and rich taste will make your cookies irresistible!
-
Measure Flour Correctly: For best results, spoon flour into your measuring cup and level it off with a knife instead of scooping directly from the bag. This prevents packed flour, which can lead to dense cookies.
-
Bake One Tray at a Time: Baking one tray at a time ensures even cooking. This way, you can monitor the baking process closely and achieve that golden-brown edge while keeping the center perfectly chewy.
-
Experiment with Add-Ins: Feel free to mix in walnuts or pecans for added crunch or swap out chocolate for white chocolate chips if you’re feeling adventurous.
How to Serve Pumpkin Chocolate Chip Cookies
These delightful cookies can be presented in various ways to enhance their appeal during gatherings or simple family dinners!
Garnishes
- Dusting of Powdered Sugar: A light sprinkle of powdered sugar adds a delicate sweetness and makes your cookies look extra inviting.
- Drizzle of Chocolate: Melted chocolate drizzled over the top can add an elegant touch and extra chocolatey goodness.
Side Dishes
- Chai Tea: The spiced flavors of chai complement the pumpkin spice in the cookies beautifully, making for a cozy pairing.
- Vanilla Ice Cream: A scoop of creamy vanilla ice cream next to warm cookies creates a delightful contrast in textures and temperatures.
- Hot Apple Cider: This warm beverage brings in fall flavors that harmonize well with pumpkin, creating a comforting dessert experience.
- Fresh Fruit Salad: A light fruit salad provides a refreshing balance to the richness of the cookies, making it a perfect side for those who enjoy variety.
Now that you’re all set with tips and serving ideas, get ready to bake these delicious Pumpkin Chocolate Chip Cookies! Enjoy each bite as you savor this autumn delight!
Make Ahead and Storage
These pumpkin chocolate chip cookies are perfect for meal prep, allowing you to enjoy their delightful flavors throughout the week. Whether you’re planning for a busy schedule or just want to have some delicious treats on hand, here’s how to store them effectively.
Storing Leftovers
- Store the baked cookies in an airtight container at room temperature for 2-3 days.
- If you prefer a softer texture, consider placing a slice of bread in the container with the cookies to help retain moisture.
Freezing
- To freeze the cookie dough, scoop the dough into balls and place them on a baking sheet lined with parchment paper.
- Freeze until solid, then transfer the cookie dough balls to a freezer-safe bag or container. They can be stored in the freezer for up to 3 months.
- For baked cookies, allow them to cool completely before freezing. Layer between sheets of parchment paper in an airtight container.
Reheating
- To reheat frozen cookie dough, let it sit at room temperature for about 1 hour before baking.
- If reheating baked cookies, warm them in the oven at 350°F (175°C) for about 5-7 minutes until they’re soft and delightful again.
FAQs
If you have questions about these delectable pumpkin chocolate chip cookies, you’re not alone! Here are some common ones:
Can I use fresh pumpkin instead of canned puree for pumpkin chocolate chip cookies?
Yes! You can use fresh pumpkin; just make sure to cook and puree it until smooth. Remember to drain any excess moisture so it doesn’t affect the cookie texture.
How can I make these pumpkin chocolate chip cookies gluten-free?
To make gluten-free pumpkin chocolate chip cookies, substitute regular flour with a good quality gluten-free all-purpose flour blend. Ensure that your other ingredients are also gluten-free.
Why are my pumpkin chocolate chip cookies flat?
Flat cookies may result from overmixing the dough or using too much liquid from the pumpkin puree. Make sure to measure accurately and mix gently until just combined.
Can I add nuts to my pumpkin chocolate chip cookies?
Absolutely! Feel free to fold in chopped walnuts or pecans along with the chocolate chips for extra crunch and flavor.
Final Thoughts
I hope you find joy in making these pumpkin chocolate chip cookies as much as I do! They perfectly capture the essence of fall with their warm spices and luscious chocolate—truly a treat everyone will love. Enjoy sharing them with friends and family (or keep them all to yourself)! Happy baking!
Pumpkin Chocolate Chip Cookies

Indulge in the delightful flavors of fall with these Pumpkin Chocolate Chip Cookies! Soft and chewy, these cookies blend the warm spices of pumpkin spice with rich chocolate chips, creating a comforting treat perfect for any occasion. Whether you’re sharing them at a cozy gathering or enjoying them after a long day, these cookies are sure to bring smiles all around. Plus, the easy-to-follow recipe requires no fancy equipment or chilling time—making it perfect for busy bakers. Grab your ingredients and get ready to create sweet memories with every bite!
- Prep Time: 15 minutes
- Cook Time: 12 minutes
- Total Time: 27 minutes
- Yield: Approximately 15 cookies 1x
- Category: Dessert
- Method: Baking
- Cuisine: American
Ingredients
- 1 cup cold unsalted butter
- 2/3 cup Libby’s Pumpkin Puree (room temperature)
- 1/2 cup granulated sugar
- 1/2 cup light brown sugar (packed)
- 2 large egg yolks (room temperature)
- 2 teaspoons vanilla extract
- 1 2/3 cup + 1 tablespoon all-purpose flour
- 2 1/2 teaspoons pumpkin spice
- 1 teaspoon baking soda
- 1/2 teaspoon fine sea salt
- 1 cup finely chopped chocolate bar or chocolate chips
Instructions
- Preheat oven to 350°F (180°C) and line two baking trays with parchment paper.
- Brown the butter in a stainless steel pan until nutty and fragrant; cool slightly.
- Spread pumpkin puree on a plate to soak up excess moisture.
- Whisk cooled butter with both sugars until sandy in texture.
- Mix in egg yolks, vanilla, and pumpkin puree until smooth.
- Gently fold in flour, pumpkin spice, baking soda, salt, and chocolate until just combined.
- Scoop dough into balls and place on prepared trays about two inches apart; press extra chocolate on top if desired.
- Bake for 9–13 minutes until edges are golden but centers remain soft; cool on wire racks.
Nutrition
- Serving Size: 1 cookie
- Calories: 150
- Sugar: 10g
- Sodium: 70mg
- Fat: 7g
- Saturated Fat: 4g
- Unsaturated Fat: 3g
- Trans Fat: 0g
- Carbohydrates: 20g
- Fiber: 1g
- Protein: 2g
- Cholesterol: 30mg